Table of Contents
OpenBSD is a Unix-like operating system known for its strong security, code correctness, and proactive measures to mitigate vulnerabilities. It's considered one of the most secure operating systems available due to its small code-base and strong default security configurations 'out of the box' compared to other distributions such as Ubuntu.
WireGuard is a VPN protocol released in 2015 that has gained traction due to its faster performance compared to older VPN protocols such as IPsec and OpenVPN. Similar to OpenBSD, WireGuard has a small attack surface due to its smaller code base compared to other VPN protocols. As of writing this, WireGuard has roughly 4,000 lines of code compared to the 400,000 lines of code in IPsec and 70,000 lines of code in OpenVPN.
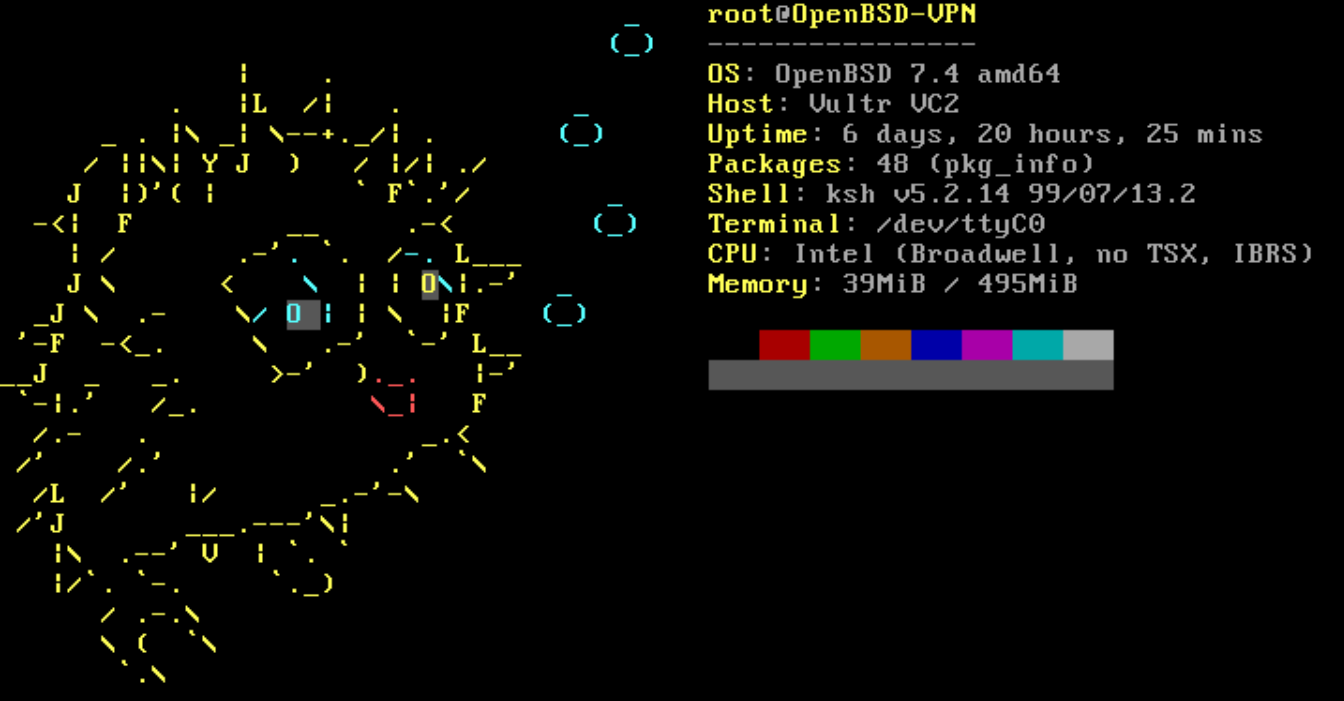
When used together, WireGuard and OpenBSD form a fast and secure VPN gateway server, great for accessing remote clients securely over SSH. The system's small footprint allows it to use less than 40MB of RAM even with multiple active VPN and SSH sessions, making it ideal for running on less powerful hardware and cheaper cloud-based systems.
Due to the low system overhead required to run WireGuard and OpenBSD, I'd recommend getting the cheapest system you can with IPv4 routing (depending on how much bandwidth you need) since OpenBSD and WireGuard are not resource intensive at all. I personally use Vultr for hosting most of my VPS instances and have been for years now; I've never had any issues with their service, even during maintenance or server upgrades. Vultr also has a great referral program where new users can earn $100 in credits for the first year. Referral link: https://www.vultr.com/?ref=9600105-8H
Recommended
Prior to installing, I highly recommend reading the manual pages for OpenBSD to learn more about how the system functions and command usage if you aren't familiar with the operating system. Everything is very well documented on their website: man.openbsd.org
Server Setup & Configuration
After installing OpenBSD on your cloud based server and hardening SSH connectivity, run the following commands in order to patch the base system, update all installed packages, and reboot to apply changes and reload the kernel:
root@openbsd# syspatch
root@openbsd# pkg_add -Uu
root@openbsd# reboot
syspatch applies binary security patches to the OpenBSD base system.
pkg_add -Uu updates all installed third-party packages to their latest available versions.
reboot ensures kernel-level patches take effect and all services restart with the updated binaries.
Install wireguard-tools for key generation and tunnel management, and vim as a text editor for modifying configuration files:
root@openbsd# pkg_add wireguard-tools vimEnable IPv4 and IPv6 forwarding at runtime so the server can route VPN traffic between interfaces. IPv6 forwarding is only needed if you plan to tunnel IPv6 traffic through the VPN:
root@openbsd# sysctl net.inet.ip.forwarding=1
root@openbsd# sysctl net.inet6.ip.forwarding=1
The sysctl changes above are lost on reboot. To make IP forwarding persistent across reboots, append the values to /etc/sysctl.conf:
root@openbsd# echo "net.inet.ip.forwarding=1" >> /etc/sysctl.conf
root@openbsd# echo "net.inet6.ip6.forwarding=1" >> /etc/sysctl.conf
Create a directory to store WireGuard's configuration files and keys, then navigate into it. All server-side WireGuard files will be stored here:
root@openbsd# mkdir -p /etc/wireguard
root@openbsd# cd /etc/wireguard
To securely connect a client and a server using WireGuard, it is essential to generate a cryptographic key pair. These keys facilitate client authentication and the encryption-decryption process for data transmission.
The private and public key pairs are primarily for authentication purposes. When a client tries to establish a connection with the server, it authenticates itself by presenting its public key, which the server will be configured to recognize as trusted. The server also authenticates itself to the client by providing its public key. This mutual authentication confirms the identities of both parties, ensuring that communications are between legitimate endpoints.
After the authentication phase, WireGuard establishes an encrypted communication channel between the client and server. However, rather than using the initial public and private keys directly for encrypting all the data, WireGuard uses these keys to generate temporary session-specific keys. These session keys are dynamically generated for each connection session, enabling the encryption and decryption of data. The use of session keys means that even if a session key were compromised, it would not affect the security of past or future sessions, nor compromise the private keys used for authentication.
Generate the server's private key and derive the corresponding public key. The umask 0077 subshell ensures private.key is created with 600 permissions, preventing any user other than root from reading it:
root@openbsd# (umask 0077; wg genkey > private.key)
root@openbsd# wg pubkey < private.key > public.key
Create a configuration file for the WireGuard wg0 tunnel interface:
root@openbsd# touch wg0.confOpen wg0.conf using a text editor and add the following. The [Interface] section defines the server's private key and listen port. The [Peer] section defines the client that will be allowed to connect:
[Interface]
PrivateKey = <SERVER-PRIVATE-KEY>
ListenPort = <SERVER-LISTEN-PORT>

[Peer]
PublicKey = <CLIENT-PUBLIC-KEY>
AllowedIPs = 0.0.0.0/0
PersistentKeepalive = 25
Change file permissions on wg0.conf and private.key to root-only access (600). Both files contain the server's private key, which must never be readable by other users:
root@openbsd# chmod 600 wg0.conf private.keyBefore configuring the firewall, verify your server's primary network interface name using ifconfig. On most cloud-hosted OpenBSD instances, the primary interface is vio0. If yours is different (e.g., em0, re0), substitute it in the firewall rules below.
Open the Packet Filter (PF) firewall configuration file:
root@openbsd# vim /etc/pf.confAdd the following three rules to the firewall configuration file:
pass in on wg0
pass in inet proto udp from any to any port <SERVER-LISTEN-PORT>
pass out on egress inet from (wg0:network) nat-to (vio0:0)
The first rule allows all traffic on the WireGuard interface. The second rule allows incoming UDP traffic on the listen port configured in wg0.conf. The third rule translates outgoing traffic from the wg0 network to the primary interface vio0 via NAT. If your primary interface is different from vio0, replace it accordingly.
Reload the PF firewall with the newly added rules:
root@openbsd# pfctl -f /etc/pf.confOpen the vio0 network configuration file:
root@openbsd# vim /etc/hostname.vio0Add the following lines to the /etc/hostname.vio0 file. This specifies the private IP address range and subnet, activates the vio0 interface, and applies the WireGuard configuration from wg0.conf on boot:
inet 10.0.0.1 255.255.255.0 none
up
!/usr/local/bin/wg setconf wg0 /etc/wireguard/wg0.conf
Client Configuration
With the server configured, the next step is setting up WireGuard on the client device. This involves installing the WireGuard tools, generating a client key pair for authentication, creating a tunnel configuration file, and then updating the server's wg0.conf with the client's public key. The steps below are performed on a Debian system but apply to most Linux distributions with minor differences in package manager commands.
Install wireguard-tools on the client device. This package provides the wg and wg-quick utilities needed to generate keys and manage WireGuard tunnels:
client@debian:~$ sudo apt-get install wireguard-toolsCreate the WireGuard configuration directory and navigate into it. This is where the client's keys and tunnel configuration will be stored:
client@debian:~$ mkdir /etc/wireguard
client@debian:~$ cd /etc/wireguard
Generate the client's private key and derive the corresponding public key. As with the server, the umask 0077 subshell ensures private.key is created with restricted permissions so only root can read it:
client@debian:~$ (umask 0077; wg genkey > private.key)
client@debian:~$ wg pubkey < private.key > public.key
Create a configuration file for the client's WireGuard wg0 tunnel interface:
client@debian:~$ touch wg0.confOpen wg0.conf with a text editor and add the following. The [Interface] section defines the client's private key and tunnel address. The [Peer] section points to the server's public key and endpoint. Adjust the address if using a different private IP configuration:
[Interface]
PrivateKey = <CLIENT-PRIVATE-KEY>
Address 10.0.0.2/24

[Peer]
PublicKey = <SERVER-PUBLIC-KEY>
Endpoint = <SERVER-PUBLIC-IP>:<PORT#>
AllowedIPs = 0.0.0.0/0, ::/0
PersistentKeepalive = 25
Change file permissions on both files to root-only access (600). The config file contains the client's private key in plaintext, so it needs the same protection as private.key itself:
client@debian:~$ sudo chmod 600 wg0.conf private.keyFinal Steps
Before starting the tunnel, copy the client's public key (from /etc/wireguard/public.key on the client) and paste it into the server's wg0.conf under the [Peer] section's PublicKey field. Likewise, the server's public key should already be in the client's wg0.conf under its [Peer] section. Below is an example of what completed configurations look like for both sides:
Important
The keys shown below are examples only. Never share your actual private keys. Always generate fresh key pairs for your own deployment.
OpenBSD Server:
[Interface]
PrivateKey = edWiTdis0BJDNomWkyKsTzkGHGWV8KNKoncnn8M9kDk=
ListenPort = 443

[Peer]
PublicKey = UO24eicj2ZfkdO/u+iV1a32I43Z0FTVZu6AuEo6pbk0=
AllowedIPs = 0.0.0.0/0
PersistentKeepalive = 25
Debian Client:
[Interface]
PrivateKey = WVtPbGvZ9jbB/yQWYXJIIgrz/g7lVISTvHU78r9V0Xg=
Address 10.0.0.2/24

[Peer]
PublicKey = aC2gF4f/c89ya13bRmd3ATzE6ETdG+/ASlNoeez0vmI=
Endpoint = 192.0.2.0:443
AllowedIPs = 0.0.0.0/0, ::/0
PersistentKeepalive = 25
With both configuration files in place, bring up the WireGuard tunnel on the server. The netstart script reads /etc/hostname.wg0 to create the wg0 interface and apply the WireGuard configuration:
root@openbsd# sh /etc/netstart wg0On the client, use wg-quick to bring up the tunnel. This sets the interface address, configures routing for the AllowedIPs ranges, and establishes the encrypted connection to the server:
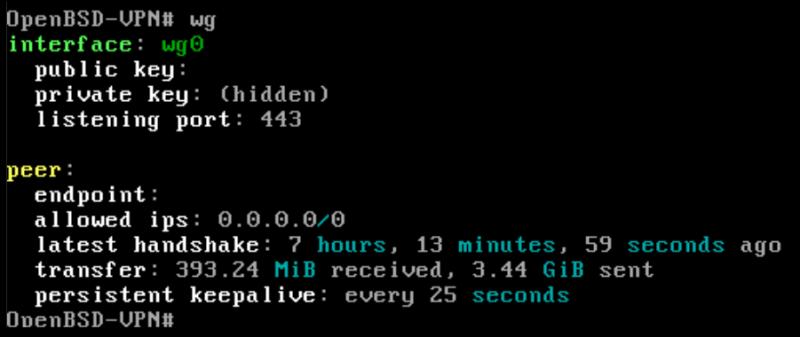
client@debian:~$ sudo wg-quick up wg0Verify the tunnel is working by checking your public IP address. If the VPN is active and configured correctly, this command should return the IP address of your OpenBSD server instead of your client's normal public IP:
client@debian:~$ curl ifconfig.meTo stop a VPN connection on a client you can run:
client@debian:~$ sudo wg-quick down wg0To make things slightly more efficient I wrote a script that can be used to start and stop the VPN connection with ./wg.sh start and ./wg.sh stop. Here is a link to the source code on GitHub: wg.sh